
This post may contain affiliate links. Please read my disclosure for more info.
When your coffee maker quits or the power’s out, your coffee cravings don’t pause. And yes, even deep in the woods while camping, away from all power, our love for coffee doesn’t fade.
Exciting news for coffee lovers! There are many ways to brew coffee on a stovetop or even over a campfire. In this post, I’m thrilled to share 14 of my top picks. You’ll learn which methods bring out the best taste, which are super easy, and some for when you’re really in a pinch.
Ready to master stove-top coffee brewing? Let’s start your journey!
How to Make Coffee on the Stove Without a Coffee Maker
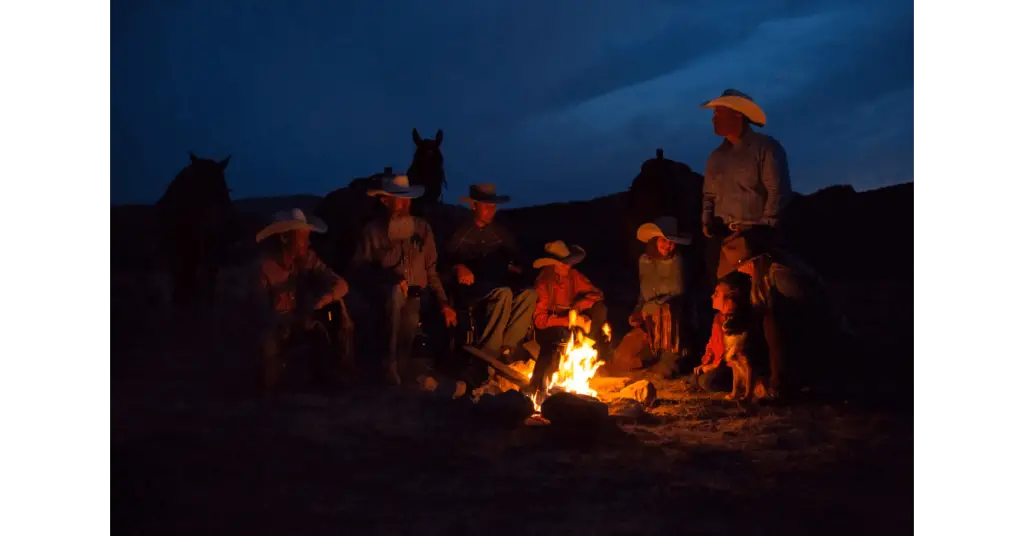
Let’s start with a timeless method. Way before we had smart coffee makers and Nespresso pods, people brewed coffee in a simple, rugged style perfect for a solo adventurer in the wild.
Let’s dive into making cowboy coffee! The taste might surprise you, but it’s all about embracing the rich tradition.
Though I don’t usually watch old cowboy movies, I imagine they brew coffee in Westworld just like this. Picture the Man in Black, crafting his brew over a campfire. It’s a scene straight out of a classic western!
No desert? No problem! Make delicious cowboy coffee right on your kitchen stovetop.
The best part? You likely have everything you need right in your kitchen. However, don’t expect a gourmet cup—this method is more about necessity than flavor. Consider it your emergency go-to or a fun way to impress guests with your rugged, cowboy-style brewing skills.
That’s enough warning, though. Here’s my favorite cowboy coffee recipe.
What you’ll need
- Water (8 ounces of water for each cup of coffee)
- Ground coffee (2 Tbsp for each cup of coffee)
- A pot
- A utensil for stirring (a spoon works)
- Mugs for serving
- (Optional) A thermometer for measuring water temperature
Time needed
In just 3 minutes, your water will boil. Give it another 4.5 minutes to cool and brew, and your coffee will be ready to enjoy!
Total: 8 minutes
Directions
- Measure the water and add it to the pot.
- Bring the water to a boil.
- Remove the pot from the heat and let it sit for 30 seconds or until the thermometer reads 200 Fahrenheit.
- Add the grounds to the water and store for a couple of seconds.
- Wait 2 minutes and then stir the mixture again.
- Wait another 2 minutes and then stir again.
- The grounds will be floating on top at this point. Pour about 1/2 cup of water (less if you are only making a small pot) on the grounds to get them to sink to the bottom.
- Transfer the coffee into the mugs, pouring slowly and blocking any stray grounds with your spoon.
- Enjoy (the experience if not the coffee)
How to Make Coffee on the Stove With a Coffee Maker
Cowboy coffee might not hit the spot, but don’t worry! You can still whip up amazing coffee right on your stovetop. All it takes is some cool gear like a percolator, Moka pot, or a Turkish coffee pot. Simple, right?
Use a stovetop percolator
Discover the key difference between percolators and drip coffee makers: you can use percolators right on your stove! These classic percolators are not just any coffee makers; they’ve been brewing delicious coffee since 1819.
Percolators can be trickier than drip coffee makers. You have to watch your brew time closely. Why? Because the water keeps cycling through the beans, making it easy to overdo it and get a bitter taste.
What you’ll need
- Water (16 ounces for each cup of coffee)
- Coarsely ground coffee (1 tablespoon of coffee grounds for each cup of coffee)
- A percolator
- Mugs for serving
Time needed
Heating water takes 3 minutes, then brewing coffee needs 7-10 minutes more.
Total: 10-13 minutes
Directions
- Measure the water and add it to the percolator’s lower reservoir.
- Add the grounds to the percolator’s upper basket.
- Heat the percolator over medium heat until you can see it peaking in the top of the percolator.
- Reduce the heat until the water is not boiling or simmering. There should be no steam coming from the percolator.
- Let the coffee percolate for 7-10 minutes, depending on the desired strength and flavor of your coffee.
- Pour the coffee into your mugs and enjoy!
Use a Moka pot (Stovetop espresso maker)
Moka pots, a beloved Italian tradition, have won hearts across Latin America too. Known as stovetop espresso makers, they actually whip up a rich, concentrated coffee, not quite the true espresso, but delicious all the same.
Moka pots are beginner-friendly! They avoid over-extracting coffee, unlike percolators, by letting water pass through the grounds just once. This simplicity makes them a great choice for new coffee lovers.
What you’ll need
- Water (enough to fill the Moka pot and to dilute the final brew if desired)
- Medium ground coffee (enough to fill the filter basket, about 2.5 Tbsp for a 4-cup Moka pot)
- A Moka pot
- Mugs for serving
- A water kettle (optional)
Time needed
Brewing coffee? It takes around 5 minutes with room-temp water. But, if you heat the water first (which adds 3 minutes), the brew time drops! A quick tip for eager coffee lovers.
Total: 5-7 minutes
Directions
- (Optional) Preheat the water in the kettle. This step helps to eliminate any metallic flavor from the Moka pot, and it provides extra water to dilute the coffee concentrate.
- Disassemble the Moka pot.
- Add the heated water, filling to the line in the brewer bottom.
- Insert the filter basket into the brewer bottom.
- Fill the basket with coffee — leveling it with your finger and wiping away any excess from the edges of the basket.
- Screw the top and bottom parts of the pot together. You want it secure but not overtightened. Be careful as it will be hot.
- Place the stovetop espresso maker onto the stove over medium-low heat, leaving the lid open.
- Watch for the coffee stream. First, you’ll hear a puffing sound, then a dark brown stream will start. The stream will lighten in color, and you should carefully (It’s hot!) remove it from the heat and close the lid when the color is a honey yellow.
- Run the bottom of the pot under cold water to stop the extraction. You can also wrap a chilled towel around the bottom of the pot.
- When the coffee stops bubbling, it’s ready to pour into the mugs, dilute with water as desired, and enjoy!
Make Turkish coffee
Turkish coffee brews in a unique pot, called a Turkish coffee pot or an Ibrik. Imagine it as cowboy coffee’s smoother cousin – rich and flawless. Perfect for beginners eager to explore coffee cultures!
Discover the bold taste of this unique coffee! It’s rich, fragrant, and served straight up with the grounds in your cup, offering an unfiltered coffee experience like no other.
What you’ll need
- Water
- Extra finely ground coffee (1 and 1/3 Tbps for every 2 ounces of water)
- Sugar (optional but traditional, 1 heaping tsp per 2 ounces of water)
- A small spoon for stirring
- An Ibrik
- Mugs for serving
Time needed
Short on time? It’s okay to heat your coffee twice instead of three times, even though three is ideal.
Total: 9-11 minutes
Directions
- Fill the Ibrik with cold water to just below
- (Optional) Stir sugar into the cold water until it dissolves.
- Add the coffee grounds and stir them into the water.
- Heat the mixture over medium heat.
- Watch for when the mixture starts to foam. As soon as the foam looks like it’s close to spilling over the edge, remove the ibrik from the heat.
- Let the ibrik sit for a few seconds until the foam settles.
- Return the ibrik to the heat until the foam rises close to spilling over again.
- Remove the ibrik from the heat and let the foam settle for a few seconds.
- One last time, return the ibrik to the heat and remove it right before the foam spills over.
- Immediately pour the coffee into the mugs. Try to get some of the foam into each mug as the foaminess is considered desirable in Turkish coffee.
- Wait about a minute for the grounds to settle to the bottom of the mug.
- Enjoy!
How to Make Coffee with Hot Water from the Stove
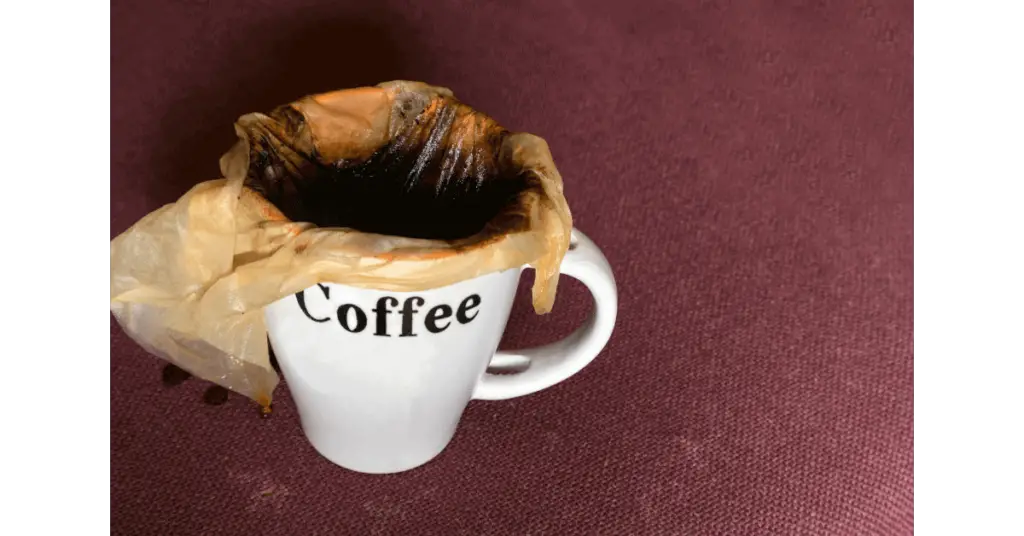
Use a homemade coffee brewing bag
Imagine cowboys brewing coffee with filters – that’s this method! It gives you a smoother, tastier cup than the old cowboy way, without any pesky grounds sneaking into your drink. Perfect for coffee beginners!
What you’ll need
- Water (8 ounces for each cup of coffee)
- Ground coffee (2 Tbsp for each cup of coffee)
- A pot (you can also use a kettle)
- A spoon or other small utensil
- A coffee filter and a string to tie it with
- Mugs for serving
Time needed
Boiling water takes 3 minutes, then brewing your coffee needs another 3-5 minutes. Quick and easy!
Total: 6-8 minutes
Directions
- Lay the filter on a flat surface and pile the coffee grounds at its center.
- Pull up the edges of the filter and tie a string tightly around it to produce a grounds-proof seal. You’ll end up with a closed container that looks like a misshapen tea bag.
- Add the water to the pot and bring it to a boil.
- Remove the pot from the heat once it’s boiling and add the coffee bag, pushing it under the water with a spoon initially to get it fully wet.
- Let the coffee steep for 3-5 minutes. You may want to play with this time to change the strength and flavor of your brew.
- Remove the bag and enjoy your coffee!
Make coffee with a coffee filter
Discover the joy of manual drip coffee! It’s like being your own barista. Perfect for those who love a hands-on approach to their morning brew.
Imagine this as a simpler take on pour-over coffee, but without needing fancy gear. Although it won’t match pour-over’s taste, it can still beat regular drip coffee in flavor. The trick? Just get the water heat and how fast you pour it spot-on.
Need a coffee filter in a hurry? Don’t worry! You can grab a cheesecloth, a handkerchief, or even a paper towel. Just make sure it’s sturdy enough to handle water and fine enough to let the liquid flow through while catching those coffee grounds.
What you’ll need
- Water (8 ounces for each cup of coffee)
- Ground coffee (2 Tbsp for each cup of coffee)
- A pot or kettle
- A coffee filter
- Clips or a rubber band to hold the filter in place
- A mug
Time needed
Boiling water takes 3 minutes, and filtering your coffee needs 2-4 minutes. Quick and easy for a perfect cup!
Total: 5-7 minutes
Directions
- Place the filter into the mug and secure it in place with the clips or band.
- Put the grounds in the filter.
- Boil the water in the pot.
- Very slowly pour the water over the grounds.
- Remove the filter and drink your “drip” coffee.
Use the fake French press method
The name might puzzle you, as it doesn’t resemble using a French press. Yet, it brews coffee with a similar taste to what you’d get from a French press.
Just like using a French press, this brewing method fully immerses the coffee grounds in water. It’s a technique also seen in Turkish and cowboy coffee. So, every sip is rich and full-flavored!
What you’ll need
- Water (8 ounces)
- Coarsely ground coffee (1 Tbsp)
- A pot or kettle
- Two mugs
Time needed
In just 3 minutes, your water will boil. Spend another 4-5 minutes soaking the coffee, then 1-2 minutes to pour it. Easy, right?
Total: 8-10 minutes
Directions
- Put the grounds in the bottom of one of the mugs.
- Heat the water to near-boiling in the pot.
- Pour about 1/4 of the water into the grounds. You want this water to fully wet the grounds.
- Pour the remainder of the water into the same mug.
- Let the mixture sit for 4-5 minutes.
- Slowly transfer the water into the second mug, leaving the grounds in the initial mug. Be careful not to jostle the grounds during this process. If you have difficulty pouring without the grounds, use a spoon to hold them back. You’ll lose a bit of water in the sludge at the bottom of the first mug, but it’s better to leave that than to risk pouring some of the grounds.
- Spoon out any bits of grounds if needed and enjoy your coffee!
Make instant coffee
Sure, brewing coffee on the stove isn’t your typical method. But that’s exactly why I titled this guide “how to make coffee on the stove.” It’s a unique twist on your usual coffee routine!
Instant coffee isn’t like regular coffee grounds. It’s actually coffee that’s been brewed and then dried out. This is why it dissolves completely in water. While many instant coffees are just okay, there are definitely high-quality options out there if you look for them.
I never liked instant coffee, but then I found Sudden Coffee. They’re on a mission to create instant coffee that tastes as good as pour-over, using top-notch beans from around the globe.
If your instant coffee comes with directions, use them. Otherwise, these tips are great for most brands.

What you’ll need
- Water (8 ounces)
- Instant coffee (1-2 tsp)
- A pot or kettle
- A mug
Time needed
Heating water takes time, but instant coffee melts super fast!
Total: 3-4 minutes
Directions
- Add the instant coffee to the mug
- Heat the water to near-boiling in the pot.
- Pour water into the instant coffee.
- Stir and enjoy.
Use a French press
The French press is a unique brewing buddy, joining the ranks of other coffee-making methods we’ve explored. It’s all about power, squeezing every bit of flavor from the coffee beans. But beware, it might not be your cup of tea if you prefer your coffee with a gentle touch.
This easy method only needs hot water from your stovetop.
What you’ll need
- Water (8 ounces per cup of coffee and a bit extra for preheating the French press)
- Medium-coarse ground coffee (About 2.5 Tbsp per cup of coffee)
- A pot or kettle
- A french press
- A spoon to stir
- Mugs for serving
Time needed
Heat your water for 3 minutes, then brew your coffee for 4. Quick and easy!
Total: 7-8 minutes
Directions
- Heat the water to near-boiling in the pot. You want it at about 200 degrees Fahrenheit when you go to pour it.
- Preheat the French press by pouring in a little hot water, swishing it around, and disposing of it.
- Add the coffee grounds to the French press.
- Pour the water into the French press and give it a quick stir with the spoon.
- Add the lid and wait 4 minutes.
- When the time has passed, slowly push the plunger all the way down.
- Immediately serve the coffee or decant it (meaning slow pour it into another container without the grounds). If you leave it in the French press with the grounds, it will over-extract them.
- Enjoy!
Use an AeroPress
The AeroPress is a fresh take on immersion brewing, similar to the French press but with a twist. It crafts a brew that’s both delicate and rich in flavor. Though it’s the newcomer among coffee makers, in just 16 years, it’s won hearts, including mine, with its unique charm.
The AeroPress Go takes your coffee adventures outdoors! Already loved for its portability, it now boasts a built-in mug, making it perfect for travel and camping.
Let’s dive into using an AeroPress the simple way, but trust me, this little gadget has many tricks up its sleeve. For a real treat, give the AeroPress espresso recipe a try and discover its full potential.
What you’ll need
- Water (8 ounces per cup of coffee, unless you want coffee concentrate)
- Fine ground coffee (2.5 Tbsp or 1 rounded scoop per cup)
- A pot or kettle
- An AeroPress
- An AeroPress filter (comes with the AeroPress)
- The AeroPress paddle (comes with the AeroPress)
- Mugs for serving (or just use the AeroPress Go’s built-in mug)
Time needed
Heat water for 3 minutes, then brew and plunge in just 1 minute. Quick and easy!
Total: 4 minutes
Directions
- Heat the water until it is near-boiling.
- Wet the filter, place it in the filter cap, and attach the filter cap to the AeroPress.
- Place the AeroPress over the mug and add the grounds.
- Pour the water up to the indicator line on the Aeropress.
- Stir for 10 seconds with the paddle, making sure to get any grounds that are stuck in the bottom.
- Insert the plunger and push it all the way down gently and slowly.
- Dispose of the filter and grounds.
- Add the remaining water to dilute the coffee concentrate if desired.
- Enjoy!
Use a Vietnamese coffee filter
Ever tried Vietnamese iced coffee? It’s amazing! This easy method is like a simplified pour-over, no fancy skills needed. What you get is a rich, strong coffee concentrate. Ideal for whipping up iced coffees or drinks that taste like espresso. Perfect for beginners!
What you’ll need
- Water (8 ounces per cup of coffee or less for coffee concentrate)
- Coarse ground coffee (1 Tbsp per cup of coffee)
- A pot or kettle
- A Vietnamese coffee filter
- Mugs for serving
Time needed
Heat water for 3 minutes, then brew for 6 to enjoy your coffee.
Total: 9-10 minutes
Directions
- Remove the damper, which is the secondary filter-like piece that comes screwed inside the cup part of the filter.
- Add the grounds to the filter and shake lightly to level them.
- Screw the damper back in place. You want it tight enough to hold the grounds in place but not enough to crush them. Screw until you feel resistance then go about half a turn more.
- Set the filter on top of the mug.
- Heat the water until it is near-boiling.
- Pour the water into the filter until it is about 1/4 full and let the water seep through for 30 seconds.
- After the 30 seconds, pour enough water to fill the filter and then close the lid.
- Wait for the water to seep through the filter and into the mug. This should take 5 minutes. If it happens much faster than that, the damper wasn’t tight enough and the grounds won’t fully extract.
- You can dilute the concentrate with more water, drink it as is, or consider adding some condensed milk for a more traditional Vietnamese experience.
Make a pour-over
Ready for a true coffee adventure? Pour overs are your ultimate test. This method is tricky and demands patience, as you’ll likely make a few mistakes before perfecting your brew. But the journey is worth it!
Once you nail it, there’s no turning back. The coffee they produce is unbeatable, unlike anything else. Warning: it’s addictive. Don’t say I didn’t warn you!
I’ll share some simple steps to start, but for a deep dive, definitely watch James Hoffman’s V60 guide. He’s a true coffee wizard!
What you’ll need
- Water (8 ounces per cup of coffee or less for coffee concentrate)
- Coarse ground coffee (1 Tbsp per cup of coffee)
- A pot or kettle
- A coffee dripper (a pour-over coffee maker, like a V60)
- A coffee filter
- Mugs for serving
Time needed
Heat water for 3 minutes, then brew for 6 to enjoy your coffee.
Total: 9-10 minutes
Directions
- Heat the water to near-boiling.
- Wet the filter and place it in the dripper on top of the mug.
- Put the grounds in the filter.
- Pour a small amount of water (about twice as much as the amount of grounds) in a circular motion and let the coffee bloom (bubble) for about 30 seconds.
- Pour the rest of the coffee slowly, continuing the circular motion.
- Wait for the coffee to finish dripping.
- Enjoy! You’ve earned it.
Bonus: How to Make Coffee Without Electricity or a Stove
Make cold brew
One of the best parts about cold brew coffee is its simplicity. You can use almost any container to make it! But, investing in a cold brew pitcher can be handy for its convenient built-in filter.
No need for water or plugs with this method—it’s all about cold brewing. Just make sure you can keep the mix chilly while it brews. Perfect for beginners looking to explore the world of coffee!
Cold-brew coffee packs a punch with its strong concentrate. If regular coffee is your go-to, you might want to add water. It’s surprisingly potent and doubly caffeinated!
The main catch? Patience is key. Forget minutes; we’re talking hours. Sure, a 12-hour wait gives you cold brew, but for the richest taste, aim for a full 24 hours. Trust us, it’s worth the wait for that perfect batch.
What you’ll need
- Water
- Coarse ground coffee (3 Tbsp per cup of water)
- A cold brew pitcher (or just any refrigeratable container)
- A coffee filter or cheesecloth (unless there is one built into your cold brew pitcher)
- Mugs for serving
Time needed
This coffee brew? It’s a slow process, think hours instead of minutes.
Total: 12-24 hours
Directions
- If using a normal container, add the grounds directly. If using a pitcher with a filter, put the grounds in the filter and place the filter in the pitcher.
- Add the water to the pitcher, making sure to wet the grounds thoroughly. If you are using a standard container, stir the water to make sure the grounds are fully wet. If using a cold-brew pitcher, just make sure to pour the water such that it wets all parts of the filter thoroughly.
- Put the mixture in the fridge for 12-24 hours.
- After the brew time is over, take the container out of the fridge.
- If you used a cold brew pitcher, just remove the filter and dispose of the grounds. If you used a regular container, pour the coffee through a coffee filter or cheesecloth to filter off the grounds.
- Dilute if desired.
- Enjoy!
Use a siphon coffee maker
A while back, a chemist buddy introduced me to the magic of siphon coffee makers. You might hear them called syphon or vacuum coffee makers, but they’re all the same cool gadget.
Coffee siphons might remind you of a science experiment, but there’s more to them than just their looks. What’s really cool is that some models use alcohol as fuel. This means you can brew your coffee anywhere, no electricity or stove needed. Perfect for adventurers and eco-friendly enthusiasts!
The downside? These machines come with many breakable parts, so handle with care. Plus, they’ll need more of your counter space compared to an AeroPress or a cold brew pitcher.
What you’ll need
- Water (8 ounces per cup of coffee)
- Coarse ground coffee (2.5 Tbsp per cup of water)
- A siphon coffee maker
- A spoon to stir
- Mugs for serving
Time needed
If you don’t pre-heat your water, heating it up can add minutes. Brewing coffee takes roughly 1.5 minutes, plus an extra minute for the final drip.
Total: 6-10 minutes
Directions
- Attach the filter.
- Add the water to the bottom chamber. You can use pre-heated water to speed things up.
- Dry the outside of the bottom chamber thoroughly.
- Put the bottom chamber on the heat source.
- Turn the heat source to maximum and place the funnel loosely into the bottom chamber.
- When the water starts to boil, finish attaching the funnel to the bottom chamber and make sure it fits tightly.
- Wait a few seconds for the water to fill the top chamber, then add the coffee to the water in the top chamber.
- Stir the mixture briefly.
- Wait 45 seconds then stir again.
- Wait another 45 seconds, then turn off the heat.
- Wait for the coffee to draw down to the bottom chamber, which should take about a minute.
- Remove the pieces, being cautious since they’ll still be hot.
- Enjoy your coffee and your new title of “coffee chemist”!
You Have the Power!
No fancy espresso machine needed! With the right tools, you can brew amazing coffee anytime, anywhere.
To make a great cup of coffee, all you need is heat – think a kitchen stove, a cozy campfire, or even a whimsical dragon’s breath! There are many fun ways to brew your perfect cup. And if you’re out of heat options, don’t worry – you can still whip up a tasty cold brew!
Time to unleash your new skills! Impress your buddies by whipping up one of these stove-top coffee recipes. Just remember, when they’re wowed by your coffee magic, give a shoutout to EasyToEspresso.com for the cool tips!